
Would you like to quickly setup the Thrinacia Atlas Crowdfunding white label platform? If so, this article is going to explain how to add the settings to start running your own Crowdfunding website.
If you intend to run a Crowdfunding platform for rewards and donations based Crowdfunding campaigns, you can use this article to quickly get set up and started so that you can start accepting donations. These settings can be added very fast and can be tested to make sure they are running properly.
Summary:
- Step 1. Connect your portal Stripe account – Enable the test or live mode, add the API keys (Secret key and Publishable key), and add the additional information that is needed for your specific website.
- Step 2. Add the theme settings – Go to the theme settings in the administrator dashboard, and fill out each section which is necessary for your platform.
- Step 3. Create the campaign to start accepting the donations – Configure the raise modes settings and create the campaign.
- Step 4. Donate to the campaign – Go to the campaign, and donate to it. Check your Stripe dashboard to make sure that the payment was successful.
Step 1. Connect your portal Stripe account
Once you have successfully subscribed to a plan, you will have to connect your portal Stripe account. Once you have connected your portal Stripe account, you will have the ability to accept donations on your platform. Connecting the portal Stripe account is easy, simply log into both your Stripe account and the Atlas platform as a portal administrator (you will have received the portal administrator credentials in the welcome email upon signup) to begin the process.
Go to the administrator dashboard on your Atlas platform. To do this, click on the following icon in the top right corner of the page:

Click on the “Administration” option. Then click on the “Portal Settings” button, and after, click on the “Payment Settings” tab as shown below:

You will need to fill out the red underlined sections to connect the Stripe account.
Starting with the “Payment Mode“. There are 2 modes that you can choose from, and the next steps will dictate what you will be adding in the following fields. If you would like to test your payments without the ability to receive real donations, then you can choose “Test Mode”. If you would like to accept real donations right away and skip the testing, you can click on the “Live Mode” option.
For this tutorial, we are going to be using test mode as this is recommended to make sure that the campaign is functioning correctly before accepting real donations and going live with the website.
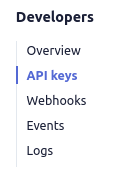
Next, you will need to add both the “Secret Key” and “Publishable Key” into the fields as shown in the above image. You can find both keys by going to the Stripe administrator dashboard and clicking on the “Developers” tab on the top right side of the screen, then click on the API keys option in the submenu.
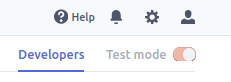
Please note that if you set your payment settings to be using test mode, you will also have to set the toggle in the Stripe dashboard to be viewing test data.

If you are using live mode, make sure this toggle is set to view the live data. All of the keys that we are copying and pasting in this tutorial are applicable in live mode as well. All you need to do is make sure that the above toggle is set to live mode.
Once you are viewing the API keys page, you will see both the publishable key and secret key that you will need to add into the payment settings fields.

Paste both of the keys into the correct fields in the Atlas payment settings page. The keys will be located as shown in the red underlined areas from the image above.
Last, it is recommended to enable the direct transactions toggle.

If you enable this toggle, it will force all of the contributions to go into the Stripe account that you have just connected to the platform.
Please note: If you are using Test Mode, and decide to start accepting live donations, you will have to switch to live mode in both Atlas platform, and the Stripe dashboard, and paste the new keys into the payment settings.
These are all of the credentials that you need to connect your Stripe account. You can add the additional following settings to fit your specific needs:
- Country
- Currency
- Bank form
Once you have added all of the information, click “Save Payment Settings” at the bottom of the page.
Step 2. Add the theme settings
Go to the administrator dashboard, and click on the “Portal Settings” tab, then on the “Theme Settings” option.

Fill out all of the necessary fields for your instance. Remember to save when you are finished with configuring the theme settings. To see your settings in action, you will also have to reload the page after saving the settings.
Step 3. Create the campaign to start accepting donations
First, we are going to configure the raise mode settings. Go to the administrator dashboard, click on portal settings, then click on the campaign settings tab. Next, scroll down to the section called “Campaign Raise Modes”

Here, you can set how you would like the transactions to be configured for the different raise modes. Learn more about different ways you can charge the backers by reading the following FAQ.
Once your settings are all configured for your campaign, it is now time to create your campaign!
Click on the “Start” button on the home page of your platform to begin creating a campaign. Simply fill in all of the necessary fields in the campaign creation steps for your campaign. When you are finished, click on the “Send For Review” button.

You will need to approve the campaign before you can start accepting the donations. Go to the administrator dashboard, and click on the campaigns tab. To approve the campaign, click on the dropdown that says “Being Edited” in the status column. Choose “Approved/Running“.
The following feature is optional to enable:
Campaign contribute options: You can configure the minimum contribution amount and other basic settings for the contributions. This feature can be found in the “Campaign Settings” area in the administrator dashboard.

Step 4. Donate to the campaign
Once your campaign has been created, you can make a test donation to the campaign to make sure it is working. To make a donation, go the campaign you have just created, and click on the blue “Contribute” button.

If you are using the test mode, you can use the following test cards to make pledges to your test campaign by going to this link.
Once you have created the pledge, and you see the successful pledge UI you can make sure that the pledge was truly successful by logging back into the Stripe dashboard and clicking on the payments item in the top menu.
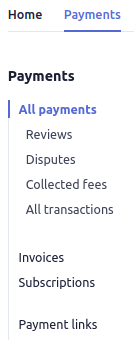
You can click on the payment to see more information.
Please note: you will not see the payment if you are using post processing mode for the campaign. If you would like to see the transactions right away, you will have to be using the direct transactions mode while contributing to a Keep it All campaign. You can read the following FAQ to learn more about troubleshooting the configuration of your payment settings.
Those are the basic features and settings that you can enable on your platform. There are many more features that can be enabled for your unique instance. If you are experiencing any issues with the above steps or experience any other roadblocks, you can create a ticket in the Nexus system, or contact Thrinacia at support@thrinacia.com. Learn more by watching the following video: